Wireless Extensometer Instructions
- Installing the batteries
- Installing the solar panel
- Powering on
- Firmware update via app
- Site installation checklist
Installing the batteries
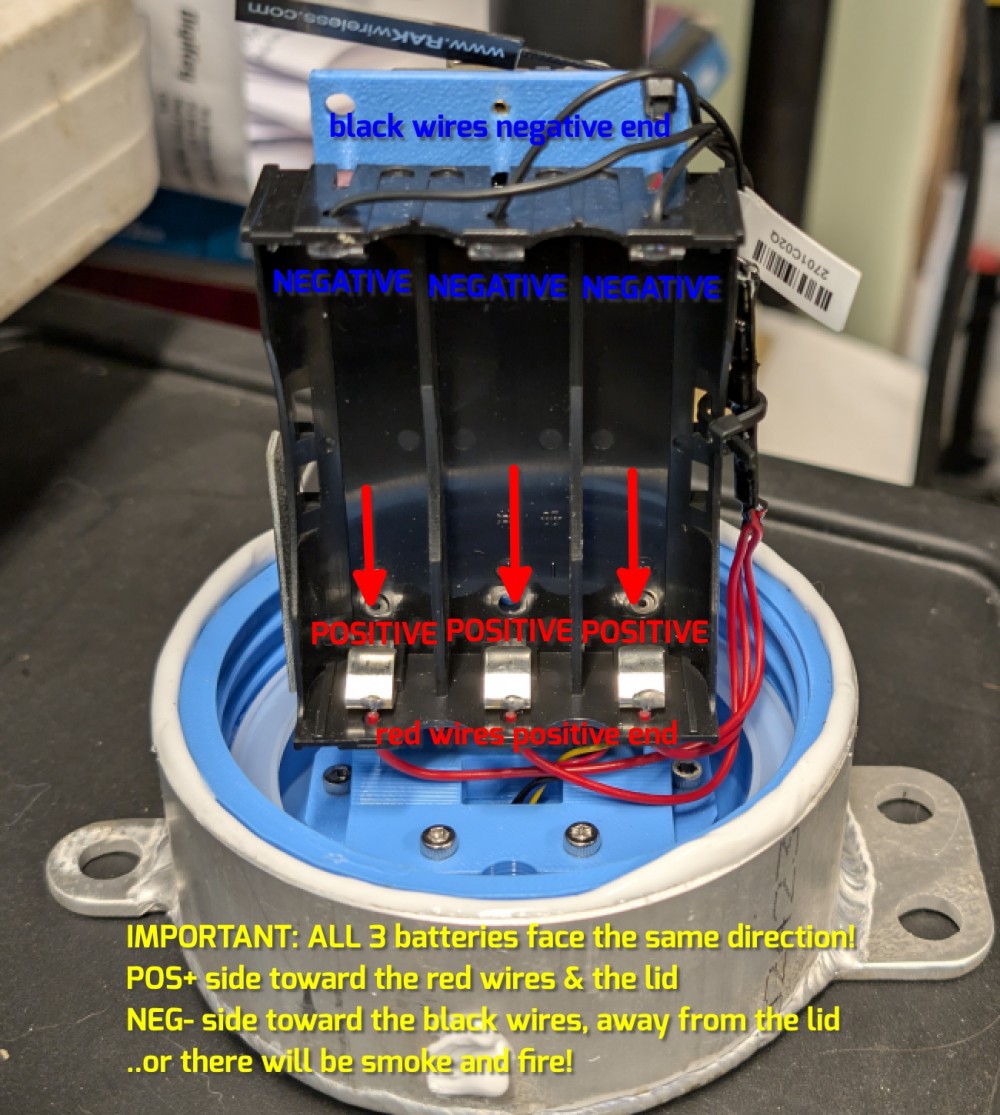
The battery holder is very tight. Make sure the batteries all fully seated. And you might need a flat head screwdriver to pry the batteries back out when removing them. Install the three 18650 lithium cells as shown. Take care when installing the batteries so as not to break the sensor frame. Support the backside of the frame while inserting a battery.
WARNING: All 3 batteries must point in the same direction!
- The + positive end of all 3 batteries must point down at the lid and the red wires.
- The – negative end of all 3 batteries must point up at the black wires.

Installing the solar panel
Reverse these steps to remove. Install your batteries before installing the solar panel! The batteries are not shown in these pictures.
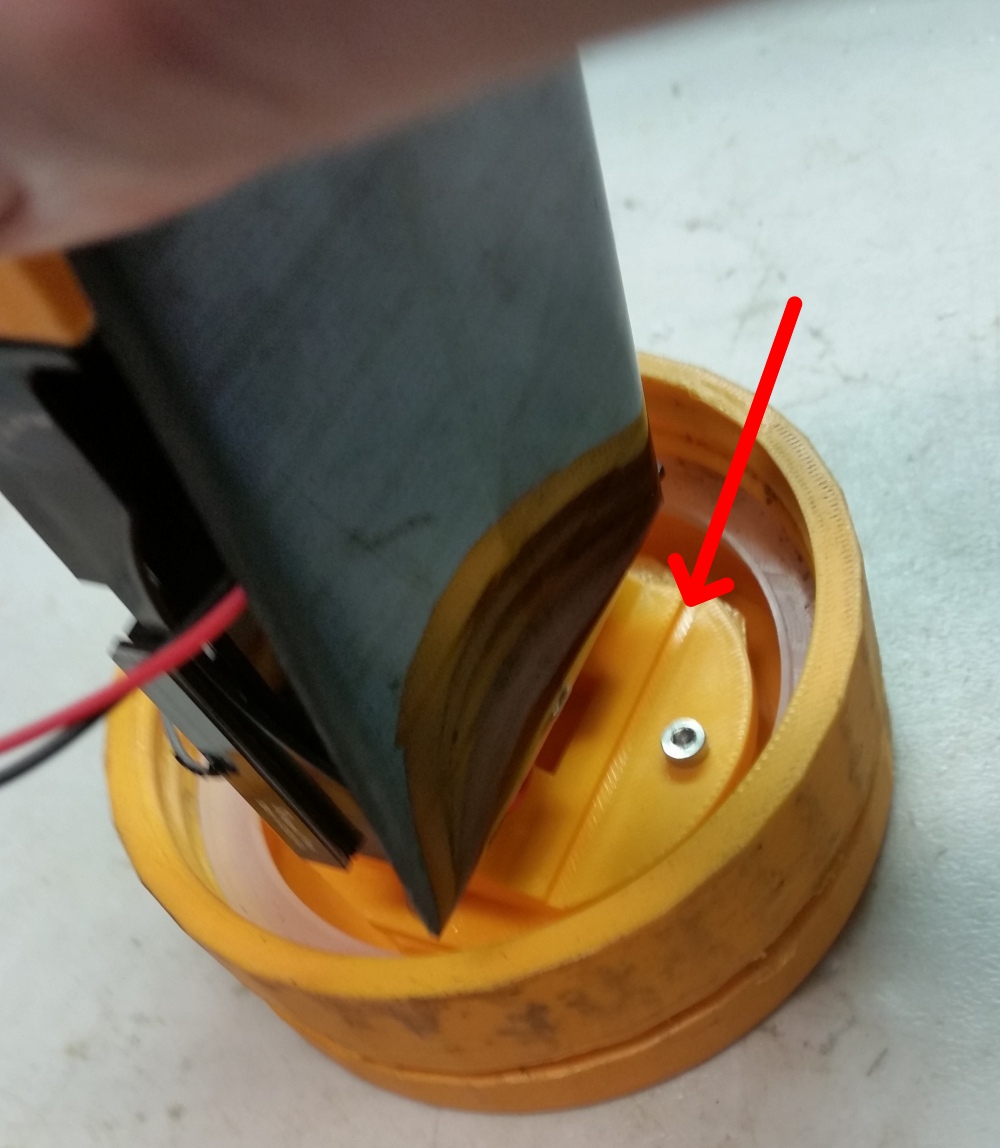
Step 1 - Insert the solar panel in the groove with the solar panel facing outward. The cable can stick out to the left.
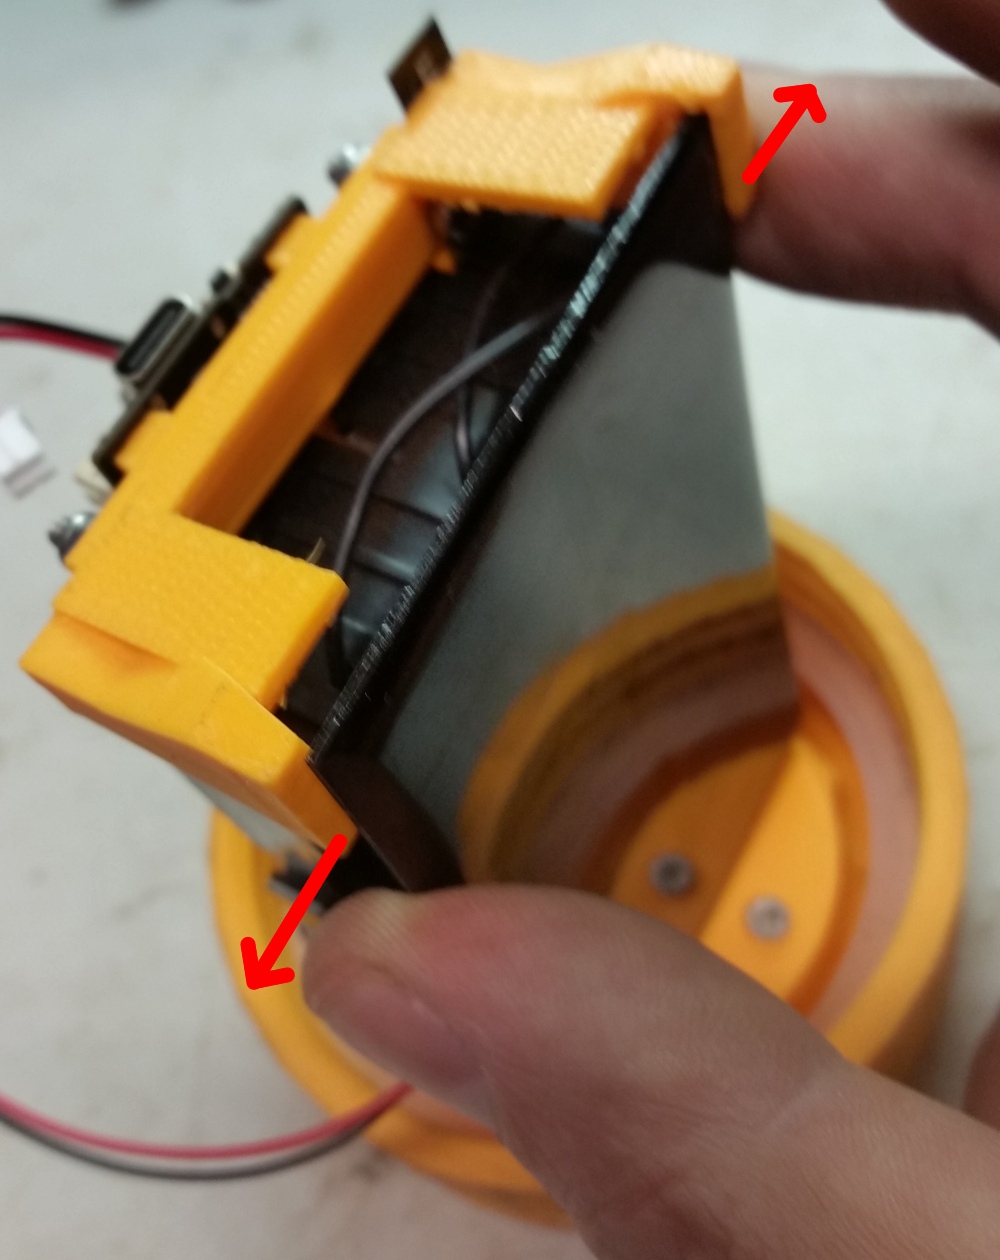
Step 2 - Bring the inside of the solar panel up against the battery holder.

Step 3 - Work the ends of the solar panel into the grooves in the solar panel holder. Work one side in then the other side. You can gently spread the holder with your fingers. It will flex and the panel should snap in.
Step 4 - Make sure the solar panel is seated in the grooves.
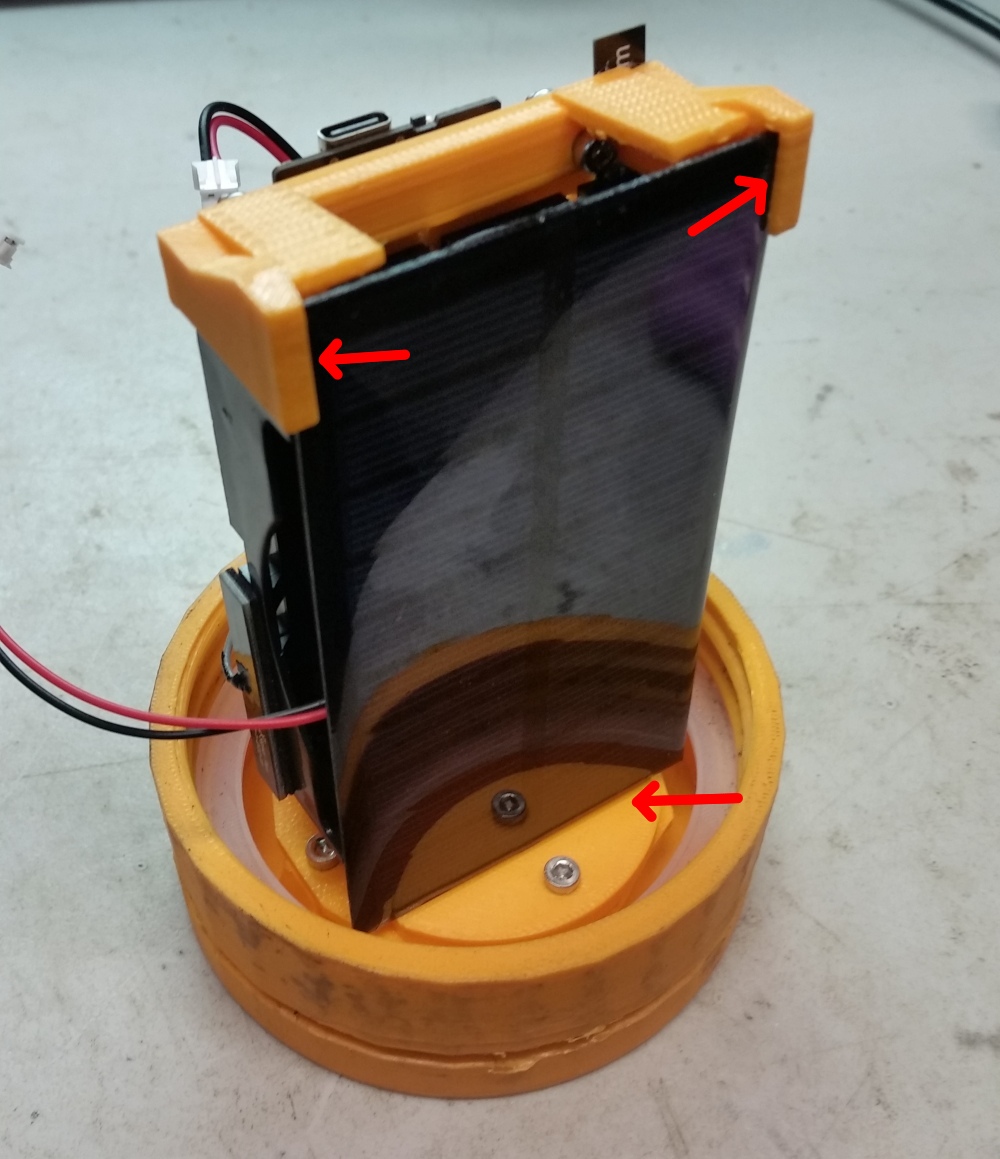
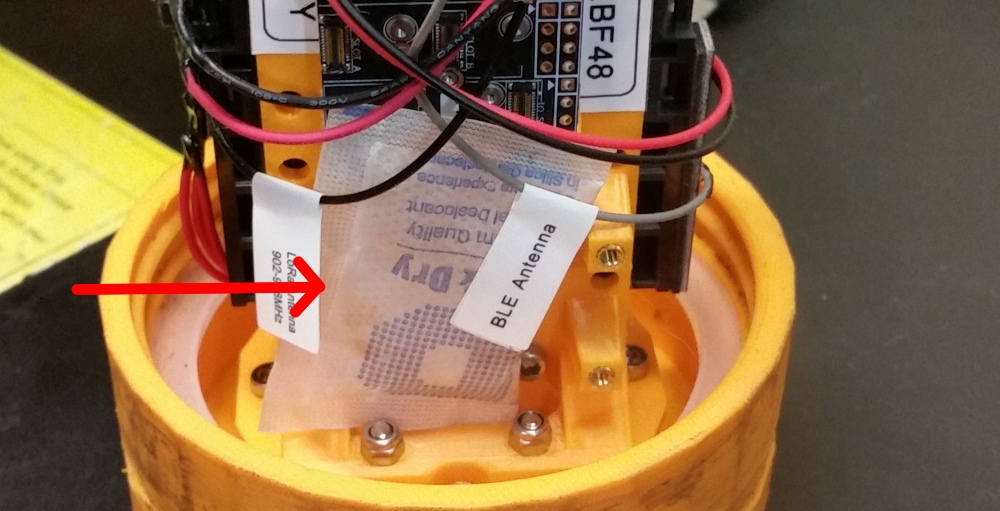
Step 5 - Done. Don’t forget the silica gel packet when you close it up!
Powering on the instrument
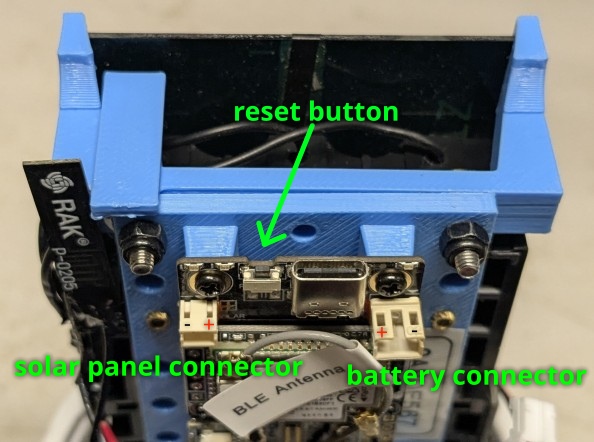
With the batteries and optional solar panel installed you can power on the instrument. Plug in the battery. The red wire goes on the left side and the black wire on the right. Then plug in the solar panel. It is reversed - the black wire goes on the left and the red wire goes on the right. As shown.
Don’t forget the microSD card and the silica gel packet!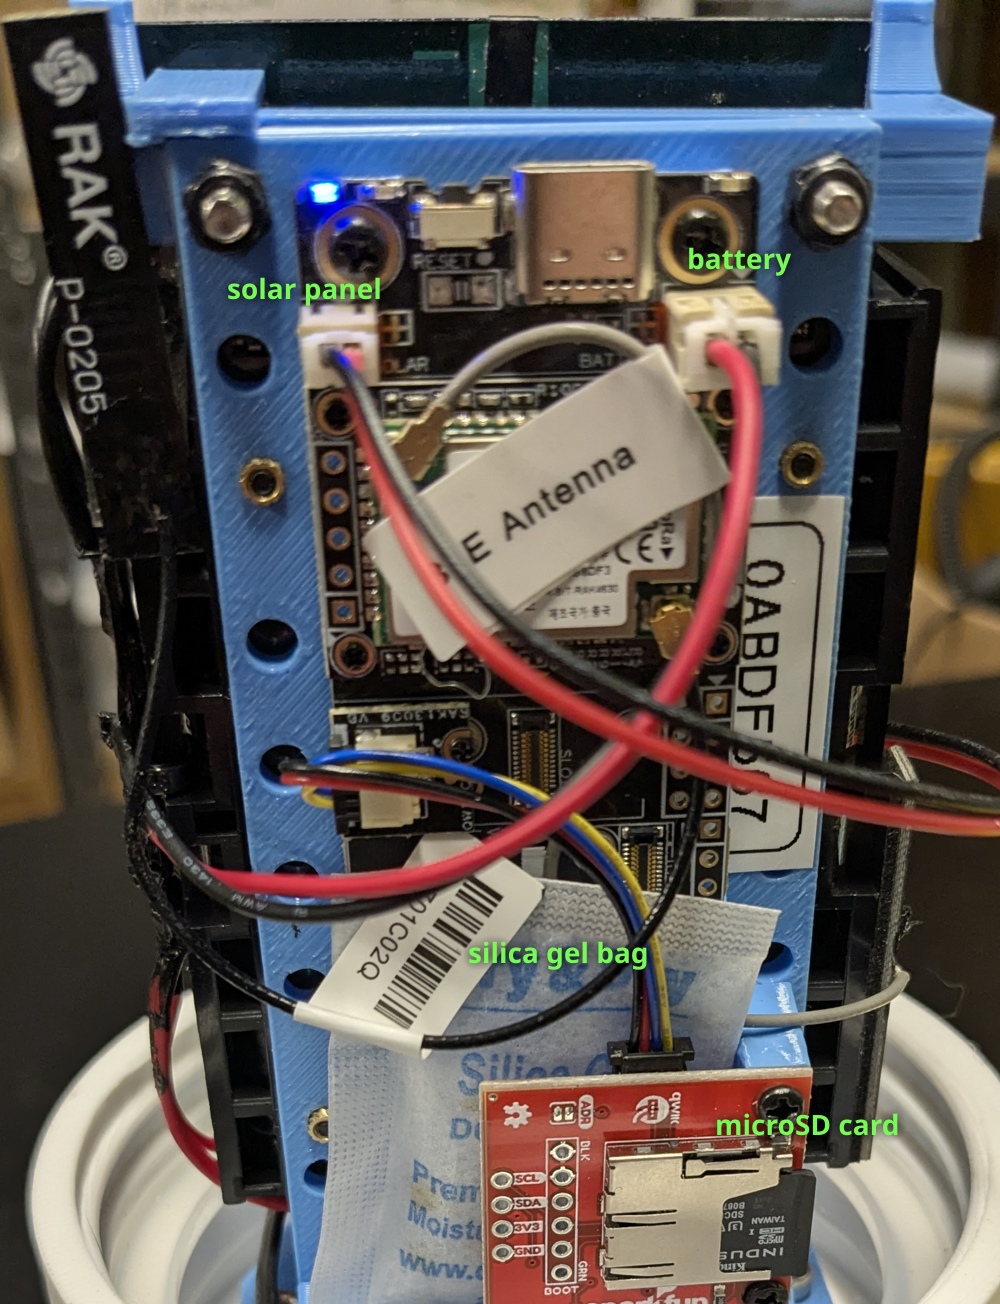
Updating the firmware via app
Step 1 - Install the “Nordic DFU” app using your smartphone’s app store. Open the app. Make sure your phone’s Bluetooth is turned on and grant the app any permissions it needs to run.
Android Play Store
Apple App Store
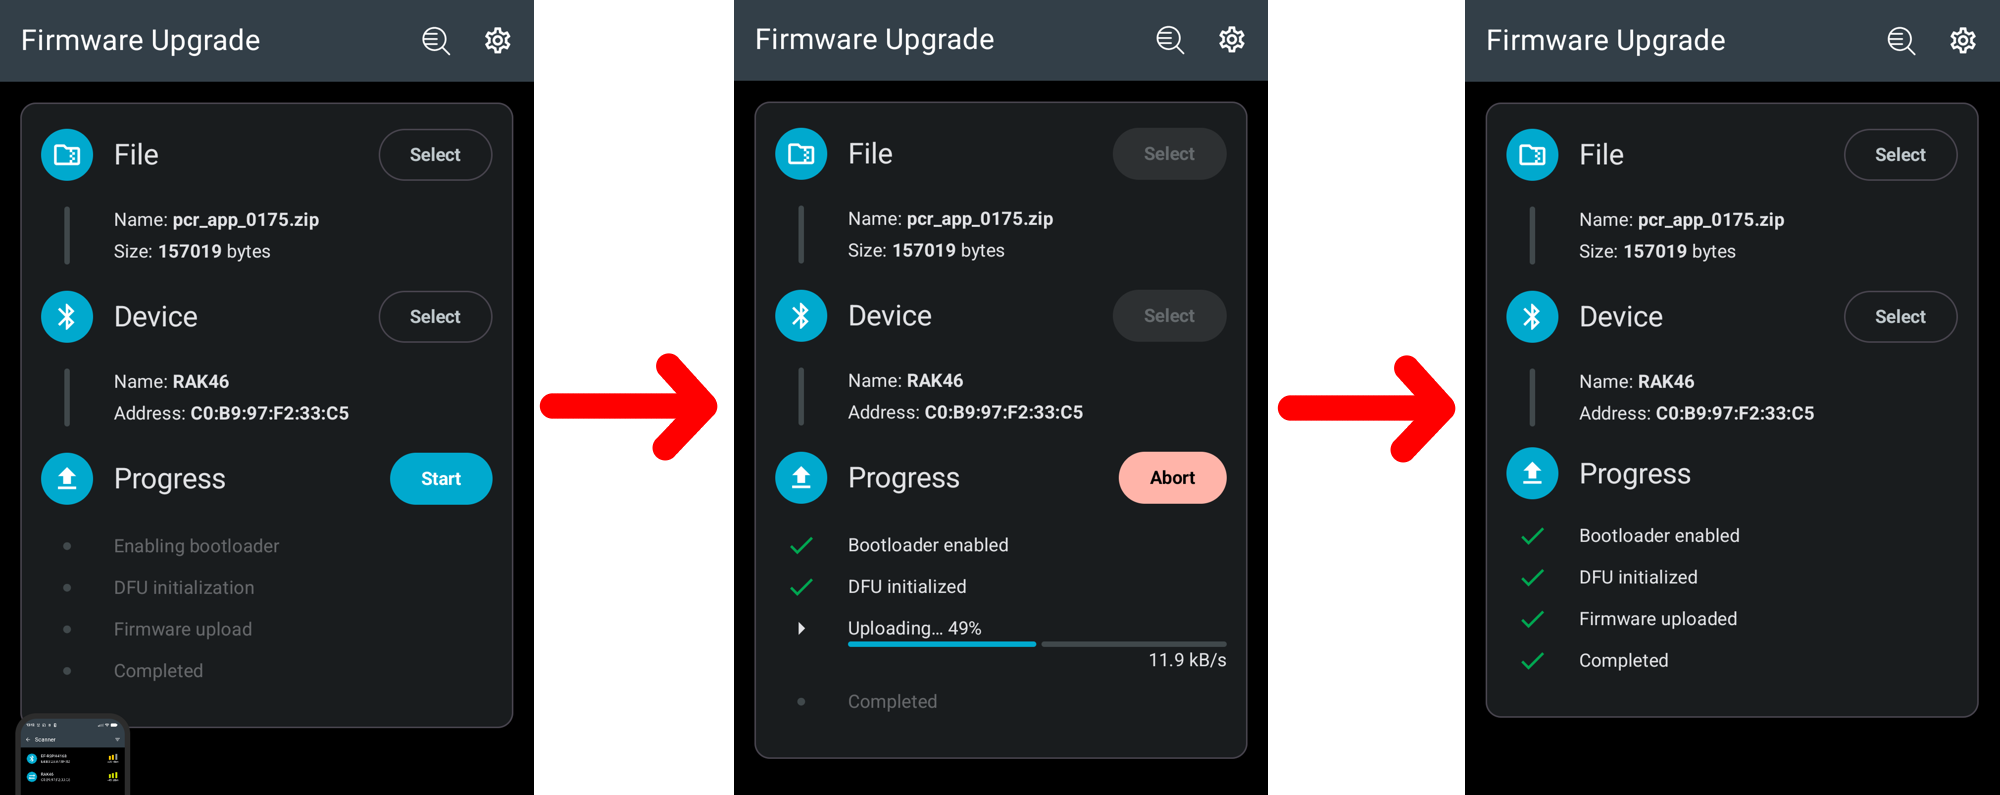
Step 2 - Select the update File on your phone by pressing the Select button. The file will be named something like pcr_appcode_0175.zip. If the file was emailed to you you may need to open the email and save the attachment on your phone’s filesystem. You can save it to your Downloads folder.
Step 3 - Power on the instrument/sensor, or reset the sensor if it is already on by pressing the little reset button next to the USBC port. The blue LED on the instrument will start blinking to show that it is ready to connect using Bluetooth. You have 30 seconds to complete the next steps. If you are too slow just reset the sensor and try again.
Step 4 - Select the Device in the app by pressing the Select button. The Device will be named something like RAK4631_OTA. If you don’t see it listed refresh the app by swiping down. Or try rebooting the sensor.
Step 5 - Press the Start button in the app and the update will begin. Make sure it completes successfully. The instrument/sensor should reboot when complete and you should see the green and blue LEDs blink for about 10 seconds. Then both LEDs turn off as the instrument goes to sleep.
Site installation checklist
When installing an instrument in the field
- Batteries well-seated
- microSD card inserted if present
- Silica moisture absorbing packet
- Battery connector plugged in. Green & blue LEDs blinked.
- Solar panel connector plugged in
- LoRa Antenna in correct orientation. Up / vertical with respect to the ground.
- Solar panel facing sky if possible
- Thread lock on mounting nuts/bolts.
- Record The Sensor ID
- Record GPS of location (lat & long)
- Take Pictures of instrument and reflector including instrument-eye view.
- Record distance to reflector(s)